Monthly Archives: June 2019

One Log Fire DIY

/ by

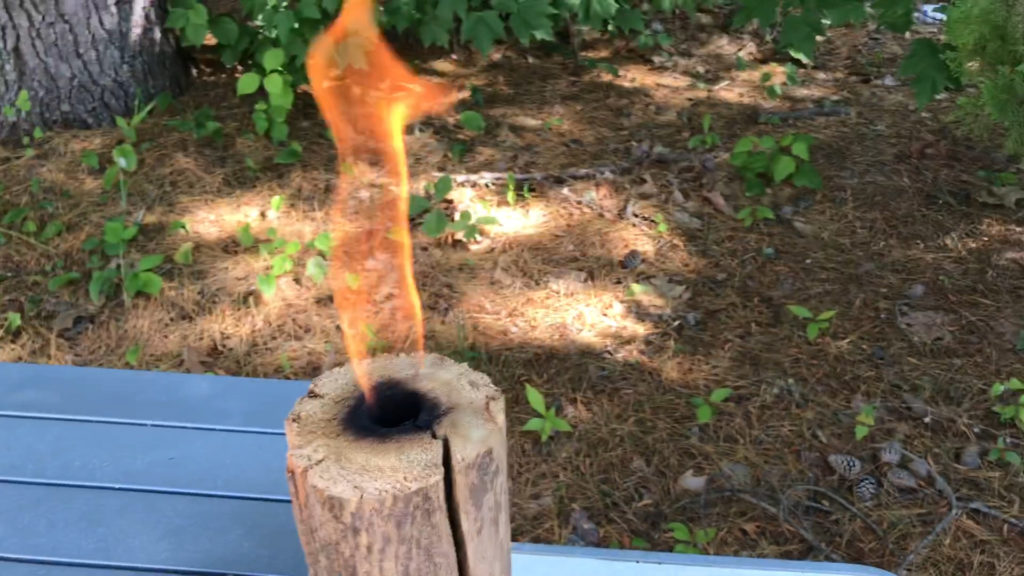
This is a quick video showing how you can make your own one log campfire. If you’re interested in making a one log fire then this video should help. To the appropriate length and then you going to drill a vertical hole in the center down about three quarters the way through the log. After that, you going to drill in from the side of the log meeting up with that vertical hole.

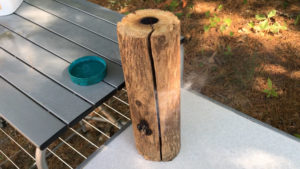
That’s pretty much all there is to it. The one thing I would add is the wider or larger log will be more stable especially if you plan on cooking on top of it. If using a smaller log such as the one I show in this video I would recommend possibly digging into the ground a little bit maybe an inch or so to stabilize it if you plan on cooking with it. However, if you just gonna burn it for the ambiance or sit to watch it as long as the basis fairly flat when you cut it it will stand just fine. With that said I do recommend you burn these in a designated fire pit area for safety.

Free ebook https://pretripchecklist.gr8.com
TeeSpring Store https://teespring.com/stores/two-camping-gurus-2


We are a participant in the Amazon Services LLC Associates Program (and other potential affiliate networks), an affiliate advertising program designed to provide a means for us to earn fees by linking to Amazon.com and affiliated sites

READ MORE

Wheel Chock Options

/ by

Free ebook https://pretripchecklist.gr8.com
Wheel Chocks Lightweight https://amzn.to/2JPLF8R
Wheel chocks Heavy duty https://amzn.to/2JPFwcQ
TeeSpring Store https://teespring.com/stores/two-camping-gurus-2

There is no shortage of wheel chalk options. Today, show you three choices that you have in this video. Of course, you can buy many different types of wheel chalks and I certainly recommend that you have some on hand these will help stabilize your RV or travel trailer when at a campground but more importantly will help prevent your camper from rolling on uneven ground. This is especially important in a travel trailer that may not have its own braking system. So in this video, I’m showing you a very lightweight commercially available wedge that is perfect for small RVs or travel trailers

I also show you a much more heavy duty commercial version of a wheel wedge/chalk that could be used on much larger rigs. This will be the one we use on our full-size school bus conversion. However if you just need something relatively lightweight and simple you certainly can build your own and I show a set of them in this video as well it’s just a large chunk a wood cut in the shape of a wedge and then two large eye bolts have been added to give you a place to hook a rope for easy retrieval and storage.

InstaFire Fire Starters

I’ve included links to the heavy-duty and lightweight version at the top of this description if you choose to purchase a set this will get you started. However, make sure whichever ones you purchase are designed for the size and weight of your RV.

We are a participant in the Amazon Services LLC Associates Program (and other potential affiliate networks), an affiliate advertising program designed to provide a means for us to earn fees by linking to Amazon.com and affiliated sites

READ MORE

Don’t Move Your RV Before Watching This Video

/ by

Before you pull out of your campsite it’s very important that you do a quick walk around of your RV or travel trailer to make sure everything is stowed properly. In this video, I walked around this 1970s RV to show you some basic things you should check every time you plan on driving your RV. First, we start off on the side and double check hoses are stowed properly compartments are closed and latched Windows are secure and tires are inflated. After that, we move to the rear of the RV checking our brake lights marker lights as well as in this case the spare tire and power cord all making sure that they are properly put away and secure for travel. It’s also a good idea to look underneath your RV to make sure you haven’t slid anything under while at camp that you may have forgotten about. Then we move to the passenger side again checking compartments and marker lights to make sure everything is in good working order and is secure. We also check the tires on this side of the RV again just to make sure we didn’t end up with a flat and not know what.

Also, make sure to take a peek underneath your camper to ensure it is clear. On the front of your RV is not as much to check other than making sure your hood is latched lights are in good working order and nothing is in the way. This whole walk around shouldn’t take more than 10 minutes or so but it can save you lots of time and misery down the road. Don’t forget to check out my free e-book and pre-trip checklists that will give you a more detailed list of things to check before you head out with your RV.

InstaFire Fire Starters

We are a participant in the Amazon Services LLC Associates Program (and other potential affiliate networks), an affiliate advertising program designed to provide a means for us to earn fees by linking to Amazon.com and affiliated sites

READ MORE

DIY RV Leveling ramps Pros & Cons

/ by

Leveling ramps https://amzn.to/2WB2FWj
Leveling Blocks https://amzn.to/2EM3kdr

There is no shortage of options out there for you to level your RV. Today, to show you a couple of DIY options that can be made very simply and save you some money. In this video, I’m showing you some planks that have been doubled up on each other to create a ramp-like structure these are a very sturdy and solid way to level your RV. The downside to them as they are very bulky and heavy so if you don’t have the space this is probably not a good option for you. These particular ones I believe are two by eights and are plenty wide enough for almost all RV tires to drive up on and not hang over. While there are many options on the market you’ll have to double check that they can hold the weight of your particular RV. That is one of the pros for these particular homemade ramps as they are strong enough to hold even the heaviest of RVs out there.

If you don’t feel like making something like this or you simply don’t have the space I’ve included a couple of links for ramps and leveling blocks on Amazon at the top of this video description feel free to check them out.

We are a participant in the Amazon Services LLC Associates Program (and other potential affiliate networks), an affiliate advertising program designed to provide a means for us to earn fees by linking to Amazon.com and affiliated sites

READ MORE

DIY Wheel Locks

/ by

Today I want to give you a quick tutorial on how I built our tandem wheel locking system. It’s pretty basic overall. I discovered that a longer piece on the top and a shorter one on the bottom produces a better grip on the tire and helps eliminate extra wiggle in your trailer. Once you determine the width that you need for your wedge pieces you can cut them out on the table saw after that put them in place and take a measurement of the distance from the bottom of the bottom want to the top of the top one and then get yourself a threaded rod long enough to go through both pieces and still allow space for washers and nuts. Not super easy to explain in written form so make sure you watch the video and I give pretty good instructions on how this project can be made very reasonably priced and quickly. If you’re not up to building something like this I did include a link to tandem wheel jacks on Amazon at the top of this description.

Dont forget your free ebook and checklist

We are a participant in the Amazon Services LLC Associates Program (and other potential affiliate networks), an affiliate advertising program designed to provide a means for us to earn fees by linking to Amazon.com and affiliated sites

READ MORE