Author Archives: shane

DIY Campfire wood carrier.

/ by / Tags: , ,

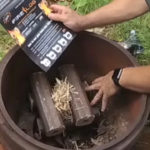
Check out the YouTube video HERE

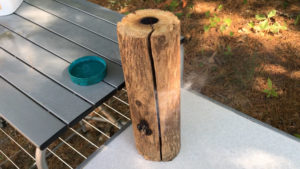
In this video, show you how to make your own campfire would carrier. This is a very basic and simple project that you probably have enough materials around the house to make it without any purchases.

I saw these in many different shapes and sizes but based on what I had I decided to make mine approximately 17 inches long for the two-handled dowel pieces and then the ropes each 3 feet long. So I took two old pieces thou made sure they were the same length and then I drilled holes about one and a half inches in on each end of the dowel. When I drilled holes I use caution and try to make sure they were center in the dowel as possible. On cells complete, I used a sander to kind of make a concave area at each of the holes just to lessen the sharp edge slightly and to deal with a little bit of tear-out that happened when I drilled through. Once I did that I took the rope which is just slightly smaller than the whole that I just drove in a best-case situation, and I threaded into the hole and tied a knot and in this case, I had to make a double knot so it would not hold back through the whole.

I repeated this process so when I was done I could hold to 17 inch long dowels one in each hand and never connected with the two pieces of three-foot rope. That’s really all there is to it.

Don’t forget your free ebook and checklist

You could also make this wood scrap branches you found on the ground, or even plastic PVC piping if that something you have available. You could even use some steel pipes but that would make it a lot heavier, better yet aluminum pipes would probably not be too bad. You also could use paracord that was readily available. At any rate, once that’s complete your ready to put this log carrier to use. You see in the video I place it on the floor laid out straight and then I stack some small wood stick pieces onto it, once that’s done I take one of the dowels and just hook it behind the rope leading to the other dowel in a way that it kind of wraps around the new pile of wood I just placed in. Once you’ve done that you can pull up on the other dowel hole the loop tight holding the kindling wood in this case snug so you can easily carry it back to your campsite.

This is a great tool to take out into the woods lay on the ground gather up small sticks branches twigs stack them on to it and then just loop the dowel behind the rope pull up on the other handle and you’re good to go. But I hope you found this video helpful please don’t forget to like subscribe and most important share videos you can help somebody else save some money and make the camping experience better with this simple DIY would carrier.

I’ll include a link to the closest thing I can find to this but I urge you to make your own assets very simple and very inexpensive. Have a great day and happy camping.

We are a participant in the Amazon Services LLC Associates Program (and other potential affiliate networks), an affiliate advertising program designed to provide a means for us to earn fees by linking to Amazon.com and affiliated sites

READ MORE

5 More thing to check on a used RV/camper

Click here to watch the video

Welcome back to two camping gurus, today we will be going to talk about five more things you need to do before you buy a used camper or RV.

In no particular order the first thing you should do in addition to my other video his check around the corners of all the windows on the interior of the RV, this is a spot that typically will show moisture first because as water leaks in from the exterior it runs down and gathers in the corner if they feel spongy or look discolored than the could be a potential problem.

Another thing to look for is the framework of the RV or travel trailer so this is where you have to take some time climb underneath and make sure this no major rust that’s gonna cost you more money than you’re expected to pay to make sure it is roadworthy.

Don’t forget to download your free ebook and pre-trip checklist.

While your underneath the RV another very important thing to look at is the propane tank and lines make sure the lines are in good shape with no corrosion, take special care to look where it goes from the outside to inside the RV to make sure there is no chafing rubbing or spots that could be leaking. This is something that’s often overlooked and may never be an issue but if it is you would rather know before you buy the RV. Make sure you go inside the RV and check as much of the line in there as well.

Another very important thing to look at is the wiring, this means opening up any compartments you can find to look for animal nesting and check the wiring throughout the unit as best you possibly can to make sure there are no signs of rodents chewing on it causing damage this would be for the living space, external storage space, as well as under the hood if it’s an RV.

Check out some camping apparel we have several options available with more to come

And the last thing you should look at or at least in this particular videos list of topics is the brakes elf course if it’s an RV you’re probably going to check that anyway and as I point out the video one thing you can do is pump and hold the brakes and then go out and check underneath and on the backside of all four wheels and tires to see if is any fluid running down them if there is this would indicate a wheel caliper leaking. I would also check through the viewing areas if possible to check the pads or shoes, and if you can’t see them that way take the time to remove the wheels. This is also another often overlooked item, especially on travel trailers. Many people will toe these things around for years and never checked the brakes. Again this list does not mean it’s a deal-breaker necessarily however these are five more things you would want to know before you buy the RV and find out you have to put hundreds if not thousands of dollars in repair before you can take it on a safe trip. Thanks for swinging by two camping gurus have a great day and happy camping.

We are a participant in the Amazon Services LLC Associates Program (and other potential affiliate networks), an affiliate advertising program designed to provide a means for us to earn fees by linking to Amazon.com and affiliated sites

READ MORE

Set up and light your lanterns

Coleman electric ignition lantern https://amzn.to/2XRHb9c
Match lite lantern https://amzn.to/2XSSQoa
Free ebook https://pretripchecklist.gr8.com
TeeSpring Store https://teespring.com/stores/two-camping-gurus-2

Today we will be showing you how to set up and light two lanterns. In this we are video looking at two lanterns made by Coleman that many people purchase and use for camping. The goal is to show you how to assemble both of these lanterns and then light them so you can enjoy your camping experience even at night. First, we’ll start with the match lit lantern, although I think this is a great little lantern as far as storage it’s not super convenient because the base does not fit to the lamp part. So these are stored as two separate pieces and could easily be misplaced. You could store them with a propane tank still installed however I don’t recommend long-term storage with the tanks still screwed on to the lamp head.

Legacy Food Storage

At any rate, once you get your lantern out and you’ve purchased yourself a propane tank they are very simple to assemble. First, you take it tank and you’ll notice the lantern has a small tube at the base of it that inserts into the center of the propane tank, then you apply a little bit of pressure while screwing the tank on to the lamp.

Now you don’t want to over-tighten but you do want it good and snug. Once that’s done just take your Coleman lantern with the tank attached and place it in the provided base which adds a significant amount of stability to the lamp if you using this on a surface such as a picnic table. As far as lighting this particular lantern as I mentioned earlier you use a match, once your match is lit you’ll insert it in one of the holes at the base of the lantern then turn your gas on and get the lit matches close to the mantels as possible without touching and they will light. And that’s all there is to it once your lamp is lit you can then adjust the light output by turning the adjustment knob to allow a different flow of propane. Of course, the more propane flow the brighter the lamp the lower propane flow the dimmer the lamp becomes. Now moving on to the electric lit Coleman lantern, assembly is essentially the same thing however one thing I really like about this particular lantern is when there is no tank attached the base will still slide in and mary to the lamp had to create one piece to store on a shelf and less risk of things getting lost or damaged. This base is also smaller when in storage mode however when you twist out the four provided legs at the bottom of the base it becomes wider and Stabler. Once you’ve done that again just take the tank put it up to the small stem on the lamp apply a small amount of pressure while screwing the tank on to the lamp once that’s done all you have to do is place the tank and the lamp into the base.

Now to light the electronic ignition Coleman lantern, all you have to do is turn the gas knob on and then almost immediately turn it all away to the high position which will engage in ignition system creating a spark just below the mantel thus lighting it and you’re ready to go. Hopefully, you found this video helpful don’t forget to come back next week to check out the new meal we are testing from legacy foods have a great day happy camping and will see you in the next video.


We are a participant in the Amazon Services LLC Associates Program (and other potential affiliate networks), an affiliate advertising program designed to provide a means for us to earn fees by linking to Amazon.com and affiliated sites

READ MORE

Legacy Food Taste Test

Today we are taste testing one of legacy foods entrées. As you know we love camping but we want to eat good food while we are out at about. Sometimes you don’t want to put the work into preparing a full meal and you can always carry lots of perishable items with you. If this sounds like some situations you run into when you’re camping been this video is for you. So today with the test the taste and the ease of preparation of legacy foods stroganoff entrée.

Legacy Food Storage

This product was very simple to prepare you just need boiling water and then follow the instructions on the package about 20 minutes later you’re eating a very tasty meal. Legacy food has many options to choose from and they have a 20 to 25-year shelf life. They also are very easy to store, they don’t take up much space and you don’t have to worry about refrigeration. Once we prepared this meal on our stove we took a look at it and said there is definitely more than four servings here as stated on the package. I would say it’s probably three servings each for Tracy and I so six servings total. There is a reason for that it appears and per their packaging and information, I was able to acquire their serving sizes are larger than many other freeze-dried or dehydrated meal choices that are out there from other companies.

Legacy Food Storage

So if you compare legacy foods with other choices you will see that the portion sizes are larger with legacy foods, this is important because if another company says it’s four servings and the price is cheaper or the same you may be getting far less then you would get if you purchased from legacy foods. At any rate, always do your research but I will say we will definitely have some legacy food meals with us. Now if you been with us long enough you know I also did a taste test of mountain house meals which are also very good and between these two companies, they do offer some variety so we will have some of those as well. The bottom line is if you’re looking for an easy meal to make while camping or just something you want to make it home and don’t want to put a lot of effort into legacy food options is definitely a way to go. With the long shelf life and easy storage packaging, you can have several of these meals set aside even for an emergency situation. With that said I highly recommend this product however we do have three more meals that we will be testing in the coming weeks and if our opinion is different on those meals will be sure to let you know.

Thanks for swinging by two camping gurus don’t forget to like subscribe and comment and as always happy camping.

We are a participant in the Amazon Services LLC Associates Program (and other potential affiliate networks), an affiliate advertising program designed to provide a means for us to earn fees by linking to Amazon.com and affiliated sites

READ MORE

3 Coleman Lantern Options

/ by

Today we are taking a look at three options of lanterns made by the Coleman company. Two of these common lanterns are powered by propane the other one is powered by rechargeable batteries. There are advantages and disadvantages to both. For example, if you have a young family or small children in the rechargeable option I believe is a great choice because of the simple and kid-safe option for lighting your campsite. If you use one of the propane options that I show you today these both get very hot and can be dangerous if left unattended or with small children.

Here are links to three options for you to look at

Coleman electric ignition lantern https://amzn.to/2XRHb9c
Match lite lantern https://amzn.to/2XSSQoa
battery operated lantern https://amzn.to/32EDbr0

InstaFire Fire Starters

All three of these run in the $20-$35 price range at the time of this video production so that part itself is not a huge factor in which choice you make. In my opinion, the two propane lanterns to give off more light and have that nostalgic sounds of the low hum of the propane while they are burning. As far as the difference between the two propane lanterns you can see in my video the one is much easier to store because of its design when the tank is removed and one has no place to attach the base so there’s a greater chance of parts becoming separated and possibly lost. As far as the burn and globe area of these two lanterns that virtually identical. It appears that Coleman mass produces some of the parts that can be used on multiple models to save money which I think is a great idea. Then they can just add the components depending on the model they are currently producing.

Another major difference between the two propane lanterns is one of them you light was a match the other one is electric ignition. So if you’re looking for simplicity to turn it off for on when you need light and I would recommend either the battery-operated model or the electric ignition propane model. As you can see in my video the propane one virtually comes on like a light switch when you turn the knob. At any rate, whatever Coleman lantern you choose I think you will be happy with it, I have used the battery-operated one in this video and the electric ignition propane model for many years now and have had no issues. I’m sure the same could be said with the match lit one however I have not used this on a regular basis so I can’t speak from experience but I can imagine being in any issues other than the fact that you have to carry matches with you in order to light it.

The advantage of the battery-operated one as you do not have to carry multiple cans of fuel however you will need a source of power to recharge it when it dies and it does come with 12 V and 110 option for charging and they store nicely in the base of the unit. All of these Coleman lanterns seem to be very durable and will stand the test of time in my opinion. If you want however you can purchase cases to put them in there will help protect them during transportation and long-term storage. All in all, I would recommend any of these lanterns for you if you going camping just keep in mind the difference between the battery-operated and the propane options I have here today and what that may mean for your family.

Dont forget your free ebook and checklist

We are a participant in the Amazon Services LLC Associates Program (and other potential affiliate networks), an affiliate advertising program designed to provide a means for us to earn fees by linking to Amazon.com and affiliated sites

READ MORE

Burgers Cooked With Instafire

/ by

Today we are testing other products from Insta fire. This is the four log campfire kit. It comes with four compressed fire logs a bag of Insta fire starter as well as a small bag of hardwood shavings. We found this kit to be very easy to use and also very effective. The process of starting this campfire is laying two of the logs on the ground approximately 2 inches apart. Then place the Insta fire firestarter granules in between those two on a fire safe surface. Once that set put the last two fire logs on top in a log cabin style format. Once you’ve done that take the shredded wood shavings and stick it in between the top two logs.

Now you’re ready to light your fire. All you need to do is light the Insta fire firestarter granules at the base of your set up and that’s pretty much it within five or 10 minutes you’ll have a full-blown campfire.

InstaFire Fire Starters

The packaging says it will burn up to three hours we found in our test that the fire itself went on for a little over an hour or two and then produced enough heat to cook on for approximately another half hour to 45 minutes may be a little longer. This is ample time in my opinion to enjoy a nice campfire as well as cooking a meal. We took the time to cook some frozen burgers on this campfire two of which were hamburgers and one was a turkey burger. We did this because the product is USDA certified and designed to either enjoy visually or cook a meal so he thought why not find out what food would taste like on this Hickory fire.

Another great feature of these products from Insta fire as they are environmentally friendly and easy to pack and carry with you. As many of you campers know you cannot move firewood from one area to another in many areas of the country, this is to help reduce the transfer of bugs and insects that may damage other forests. With that in mind, this product is a great alternative because you can have several packs of these neatly stored in your camper because they are bug-free and can be transported wherever you would like.

So the next time you need to let yourself a campfire make sure you have some Insta fire products on hand as well as this fall log fire kit. As far as the burgers you’ll see in the video that we liked them however my son was not super impressed with the smoky flavor and I might’ve overcooked them a little bit making them a little crunchy on the outside. As far as my wife and myself we thought they were great I like a little charbroil covering on my burgers.

InstaFire Cross-Fire Plasma Lighter

We are a participant in the Amazon Services LLC Associates Program (and other potential affiliate networks), an affiliate advertising program designed to provide a means for us to earn fees by linking to Amazon.com and affiliated sites

READ MORE

Top of the line fire starter review

/ by

Today we are testing two products from Instafire. These products are a fire starting products one of them is their military grade firestarter. The way with testing this product is using some dry pallet would and then placing some wet wood on top to see if the Insta fire will ignite the wet wood directly. Where using a wet pine log cut in half and half as well. I tried to make this set up as identical as possible to get a good comparison of the two products. As far as how much we use that would be a quarter cup of each and then you put the wet wood on top without smothering it and that’s why I use the other sticks that you see.

InstaFire Fire Starters
Don’t forget your free Ebook

I also tested some of this product last week in a one log fire. It worked very well however in this test it did not actually ignite any of the wet wood but it did char it quite a bit to the point that eventually it would light if you used enough of the product or much more kindling wood underneath. However, we were not testing that would simply trying to replicate what they advertise for this product. While I will say it did not actually light the wood I still stand by the product because it certainly would get you a fire going in almost any situation including a very wet environment. As you can see in this video if we were to add smaller pieces of wood even if it was wet it would have plenty of time to dry out from the Insta fire product burning and then eventually igniting the wet logs. I do have a few more products that they provided for me to test those videos will be coming soon. Will also be cooking food over some of it so we can see how the taste is as well. A few things that I like about this product is it is environmentally friendly and the ash will just turn to fertilizer type product for the soil. Also, it seems to stay lit very well in windy conditions. And of course, it can be stored near food was and not worry about contamination.

InstaFire Fire Starters

So if you’re heading out camping or you want to have a product around that will ensure you can light a fire in almost any situation then I highly recommend you checking out Insta fires product line. It can be used for camping hiking or even a backyard cookout and most of all in an emergency situation.

Check out the tee shirts we have

We are a participant in the Amazon Services LLC Associates Program (and other potential affiliate networks), an affiliate advertising program designed to provide a means for us to earn fees by linking to Amazon.com and affiliated sites

READ MORE

Instafire, Does it work

/ by
InstaFire Fire Starters

Today I picked up some Insta fire firestarter I’m putting it to the test. If you’re looking to find an easy way to start a fire even in wet conditions this stuff certainly seems very promising. In today’s video, I’m using it to light the one log fire. If you are interested in how I made this log to check out last week’s video where I show you the process however it’s very simple and you can purchase them if you would rather do that than make your own.

InstaFire 2-gallon pail

At any rate, when I first tried to use the Insta fire firestarter I put way too much in a log blocking any chance of airflow once I realized my issue I removed all of it started again and it worked fantastically. Now I have a pretty good-sized bucket of this so plan on doing other videos within the future however Insta fire did reach out to me and offered me some free samples to also review which I will do in the coming weeks. One thing I will assure you is even though they provided the future product that I’ll be featuring I will give an honest and fair review.

Free ebook https://pretripchecklist.gr8.com
TeeSpring Store https://teespring.com/stores/two-camping-gurus-2

We are a participant in the Amazon Services LLC Associates Program (and other potential affiliate networks), an affiliate advertising program designed to provide a means for us to earn fees by linking to Amazon.com and affiliated sites

READ MORE

One Log Fire DIY

/ by

This is a quick video showing how you can make your own one log campfire. If you’re interested in making a one log fire then this video should help. To the appropriate length and then you going to drill a vertical hole in the center down about three quarters the way through the log. After that, you going to drill in from the side of the log meeting up with that vertical hole.

That’s pretty much all there is to it. The one thing I would add is the wider or larger log will be more stable especially if you plan on cooking on top of it. If using a smaller log such as the one I show in this video I would recommend possibly digging into the ground a little bit maybe an inch or so to stabilize it if you plan on cooking with it. However, if you just gonna burn it for the ambiance or sit to watch it as long as the basis fairly flat when you cut it it will stand just fine. With that said I do recommend you burn these in a designated fire pit area for safety.

Free ebook https://pretripchecklist.gr8.com
TeeSpring Store https://teespring.com/stores/two-camping-gurus-2


We are a participant in the Amazon Services LLC Associates Program (and other potential affiliate networks), an affiliate advertising program designed to provide a means for us to earn fees by linking to Amazon.com and affiliated sites

READ MORE

Wheel Chock Options

/ by

Free ebook https://pretripchecklist.gr8.com
Wheel Chocks Lightweight https://amzn.to/2JPLF8R
Wheel chocks Heavy duty https://amzn.to/2JPFwcQ
TeeSpring Store https://teespring.com/stores/two-camping-gurus-2

There is no shortage of wheel chalk options. Today, show you three choices that you have in this video. Of course, you can buy many different types of wheel chalks and I certainly recommend that you have some on hand these will help stabilize your RV or travel trailer when at a campground but more importantly will help prevent your camper from rolling on uneven ground. This is especially important in a travel trailer that may not have its own braking system. So in this video, I’m showing you a very lightweight commercially available wedge that is perfect for small RVs or travel trailers

I also show you a much more heavy duty commercial version of a wheel wedge/chalk that could be used on much larger rigs. This will be the one we use on our full-size school bus conversion. However if you just need something relatively lightweight and simple you certainly can build your own and I show a set of them in this video as well it’s just a large chunk a wood cut in the shape of a wedge and then two large eye bolts have been added to give you a place to hook a rope for easy retrieval and storage.

InstaFire Fire Starters

I’ve included links to the heavy-duty and lightweight version at the top of this description if you choose to purchase a set this will get you started. However, make sure whichever ones you purchase are designed for the size and weight of your RV.

We are a participant in the Amazon Services LLC Associates Program (and other potential affiliate networks), an affiliate advertising program designed to provide a means for us to earn fees by linking to Amazon.com and affiliated sites

READ MORE